Crane
The best-known traditional model. Learn the petal fold and the inside reverse fold.
- DifficultyIntermediate
- PaperSquare, 15 × 15 cm
- Steps19
- About15 min
Why this level: Petal folds and inside reverse folds move several layers at once, so the order matters.
You need: 1 sheet of origami paper
Preview Preview: checked on screen; real-paper verification is in progress.
Steps at a glance
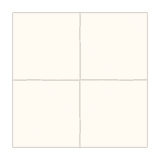
1. Fold in half and unfold
White side up. Fold the bottom edge to the top edge and unfold, then fold the left edge to the right edge and unfold.

2. Turn over
Turn over so the colored side is up.

3. Fold both diagonals
Fold one corner to the opposite corner to make a triangle, then unfold. Repeat on the other diagonal.

4. Collapse into a square base
Turn the paper so a corner points down. Using the creases, bring the top, left and right corners down to the bottom corner and flatten.

5. Fold the sides to the center
Open end pointing down. Top layer only: fold the two lower edges to the center line to make a kite shape.

6. Fold the top down and unfold
Fold the top triangle down over the flaps, crease firmly, and unfold.

7. Unfold the side flaps
Unfold the two side flaps. The creases stay.

8. Petal fold
Lift the bottom corner of the top layer upward. Let the sides fold in along the creases to meet at the center, and flatten into a long diamond.

9. Turn over
Turn the model over.
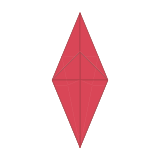
10. Fold the sides on this side
As before, fold the lower edges of the top layer to the center line.

11. Unfold the side flaps
Unfold the two flaps again.

12. Petal fold this side
Petal fold just like the other side. This shape is the bird base.
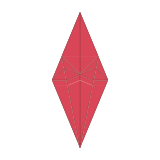
13. Narrow the lower flaps
Fold the lower edges of the top layer to the center line to make the legs thin.
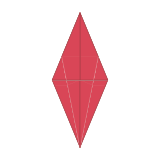
14. Turn over
Turn the model over.
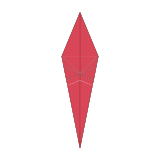
15. Narrow this side too
Fold the lower edges to the center line on this side too.

16. Make the neck
Push the thin right flap up between the front and back layers of the body so it points up at an angle (inside reverse fold).

17. Make the tail
Do the same with the left flap.

18. Make the head
Inside reverse fold the tip of the neck downward to form the head.

19. Lower the wings and stand it up
Fold the front wing down along the top of the body, and the back wing down behind. Spread the wings and stand it up — done!