Traditional frog
The traditional Japanese frog from the frog base. All four legs are shaped with inside reverse folds.
- DifficultyChallenging
- PaperSquare, 15 × 15 cm
- Steps22
- About30 min
Why this level: Four squash folds, four petal folds, then three inside reverse folds on each thin leg.
You need: 1 sheet of origami paper
Preview Preview: checked on screen; real-paper verification is in progress.
Steps at a glance

1. Fold in half and unfold
White side up. Fold the bottom edge to the top edge and unfold, then fold the left edge to the right edge and unfold.

2. Turn over
Turn over so the coloured side is up.

3. Fold both diagonals
Fold one corner to the opposite corner to make a triangle, then unfold. Repeat on the other diagonal.

4. Collapse into a square base
Turn the paper so a corner points down. Using the creases, bring the top, left and right corners down to the bottom corner and flatten.
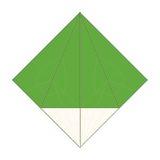
5. Squash the right flap
Lift the top right flap upright, open its two layers and press it flat so its folded edge lies on the centre line. A coloured triangle shows above a white one.
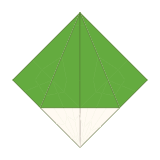
6. Turn over and squash
Turn the model over. Squash the top right flap the same way.
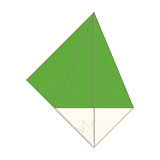
7. Turn a layer, then squash
Turn the top right layer over to the left like a page. Squash the flap that is now on the right.

8. Squash the last flap
Turn over, turn one layer from right to left and squash the last flap. Every side now shows a coloured triangle above a white one.
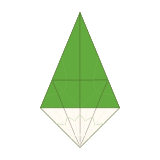
9. Crease for the petal fold
Fold the two lower edges of the top layer to the centre line and unfold. Then fold the whole top down along the line joining the ends of those creases, and unfold.

10. Petal fold
Lift the coloured layer below the horizontal crease upwards. Its sides swing in to the centre line, and the lower edges of the white layer underneath fold in along the creases. Flatten: a small diamond appears.

11. Turn over; petal fold
Turn over. Crease the two lower edges on this side too, then petal fold the same way.
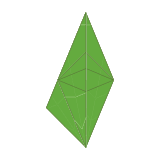
12. Turn two layers; petal fold
Turn two layers from right to left to show a side that is not folded yet. Crease it and petal fold.

13. Petal fold the last side
Turn over, turn two layers from right to left and petal fold the last side. This is the frog base.

14. Narrow the bottom
Fold the two lower edges of the top layer to the centre line. The part that becomes the legs gets thinner.
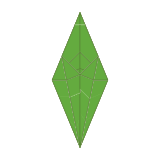
15. Turn over; narrow
Turn over. Fold the two lower edges to the centre line on this side too.
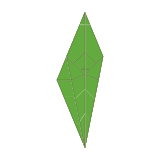
16. Turn two layers; narrow
Turn two layers from right to left. Fold the lower edges of the new side to the centre line.
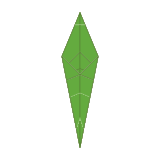
17. Narrow the last side
Turn over, turn two layers from right to left and narrow the last side the same way. Four thin legs hang at the bottom.

18. Make the front legs
Inside reverse fold the two front legs up and out at an angle: push each one up between its own layers.

19. Make the back legs
Inside reverse fold the two back legs out to the sides.

20. Bend the knees
Inside reverse fold all four legs again near the middle: the front legs bend up, the back legs bend down.

21. Make the feet
Inside reverse fold the end of each leg so the feet point outwards.

22. Shape the head
Fold the top point a little behind to blunt the head. Your frog is done!