Skip to content
Paper Play

Plants & flowers

Daylily

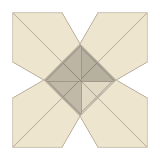
Four broad, flat petals surround a hollow square cup above a long pointed stem.

  • DifficultyChallenging
  • PaperSquare, 15 × 15 cm
  • Steps23
  • About30 min

Why this level: Trisect the top angle, squash four narrow pockets, petal-fold them, and open a three-dimensional cup.

You need: 1 sheet of origami paper

Start folding

Story

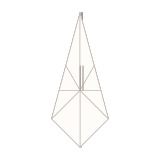
This daylily is known as a traditional Japanese paper flower. Its square base begins with the top angle divided into thirds. Small pockets become petal folds, then open around a square center above a long stem. Its first folder and exact date of origin are not known.

Did you know? The petals can be curled around a pencil. This guide uses the flat fold-back alternative, leaving a clear square center and angular petals.

Learn more (external sources)

Steps at a glance

  1. 1. Crease both diagonals

    Begin with the white side up. Bring opposite corners together and unfold, then repeat on the other diagonal.

  2. 2. Turn over; crease the halves

    Turn over. Match the top and bottom edges, crease and unfold; repeat with the left and right edges.

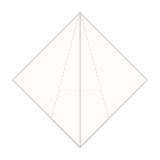
  3. 3. Gather the preliminary base

    Bring the horizontal and vertical creases inward while the diagonal creases fold outward. Flatten the small square and put its closed corner at the top.

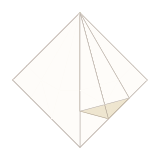
  4. 4. Squash the right pocket

    Work with the front layers. Divide the top right angle into three equal angles, open the side pocket, and squash it flat with its center crease aligned.

  5. 5. Squash the left pocket

    Work with the front layers. Divide the top right angle into three equal angles, open the side pocket, and squash it flat with its center crease aligned.

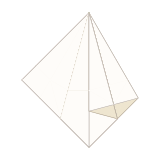
  6. 6. Petal-fold the left pocket

    Crease the two lower edges of this small pocket to its center and unfold. Lift the lower tip, tuck the side folds inward, and flatten the flap upward.

  7. 7. Tuck half of the left flap

    Mountain-fold the outer half of the raised narrow flap along its center. Tuck it directly behind the wide triangle attached to the same flap.

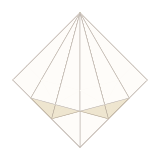
  8. 8. Petal-fold the right pocket

    Crease the two lower edges of this small pocket to its center and unfold. Lift the lower tip, tuck the side folds inward, and flatten the flap upward.

  9. 9. Tuck half of the right flap

    Mountain-fold the outer half of the raised narrow flap along its center. Tuck it directly behind the wide triangle attached to the same flap.

  10. 10. Turn over

    Turn the whole model over.

  11. 11. Squash the right pocket

    Work with the front layers. Divide the top right angle into three equal angles, open the side pocket, and squash it flat with its center crease aligned.

  12. 12. Squash the left pocket

    Work with the front layers. Divide the top right angle into three equal angles, open the side pocket, and squash it flat with its center crease aligned.

  13. 13. Petal-fold the left pocket

    Crease the two lower edges of this small pocket to its center and unfold. Lift the lower tip, tuck the side folds inward, and flatten the flap upward.

  14. 14. Tuck half of the left flap

    Mountain-fold the outer half of the raised narrow flap along its center. Tuck it directly behind the wide triangle attached to the same flap.

  15. 15. Petal-fold the right pocket

    Crease the two lower edges of this small pocket to its center and unfold. Lift the lower tip, tuck the side folds inward, and flatten the flap upward.

  16. 16. Tuck half of the right flap

    Mountain-fold the outer half of the raised narrow flap along its center. Tuck it directly behind the wide triangle attached to the same flap.

  17. 17. Spread the four pairs

    Keep the closed top together. Separate the layers into four pairs and spread them toward the front, back and sides, preserving their order like book pages.

  18. 18. Open the square cup

    Ease the four lower flaps apart evenly. Let the inner folds unfold until a hollow square cup forms between them.

  19. 19. Fold back petal 1

    Fold the broad petal outward along one side of the square rim. Keep the petal flat for the angular finish.

  20. 20. Fold back petal 2

    Fold the broad petal outward along one side of the square rim. Keep the petal flat for the angular finish.

  21. 21. Fold back petal 3

    Fold the broad petal outward along one side of the square rim. Keep the petal flat for the angular finish.

  22. 22. Fold back petal 4

    Fold the broad petal outward along one side of the square rim. Keep the petal flat for the angular finish.

  23. 23. Point the stem down

    Turn the whole flower so its long stem points down. Settle the square center and four petals evenly.

Settings

Clear saved data