Skip to content
Paper Play

Animals

Double-boat butterfly

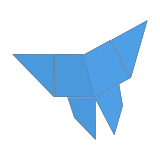
A traditional butterfly made from the double boat: its points become the wings, and when you spread them at the end the body stands up between them.

  • DifficultyIntermediate
  • PaperSquare, 15 × 15 cm
  • Steps13
  • About12 min

Why this level: You pull out the double-boat corners twice, then fold many layers in half at once and fold them back on a slant to make the wings.

You need: 1 sheet of origami paper

Preview Preview: checked on screen; real-paper verification is in progress.

Start folding

Story

The double boat is one of the old kindergarten folds, and turning it into a butterfly is old too. A German book of Froebel kindergarten activities from 1910 shows a butterfly made by pulling the hidden flaps out of the double boat. We cannot tell from its one picture whether it is exactly the butterfly folded today, but both belong to the same double-boat family. Nobody knows who folded the first one.

Did you know? The same double boat leads to boats, a sailboat, the trick boat — and this butterfly. One base can start many different models.
Learn more (external sources)

Steps at a glance

  1. 1. Crease the centre line

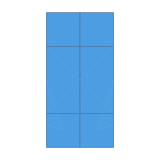
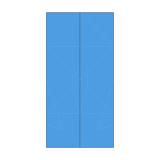
    White side up. Fold the right edge over to the left edge and unfold to mark the vertical centre line.

  2. 2. Fold the sides to the centre

    Fold the left and right edges in to meet on the centre line, like closing two doors.

  3. 3. Crease the top and bottom

    Fold the top edge and then the bottom edge to the middle, creasing well, and unfold each again.

  4. 4. Pull out the bottom corners

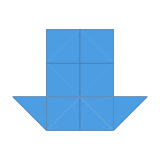
    Fold the bottom edge up to the middle along its crease while pulling the two hidden corners out to the sides as points. Press it flat.

  5. 5. Pull out the top corners

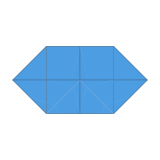
    Do the same at the top: fold the top edge down to the middle while pulling the two hidden corners out to the sides, and press flat. You get a long hexagon.

  6. 6. Fold the bottom points down: lower wings

    Fold each bottom point down along the line from the centre point to the bottom corner of the middle square. The two points meet below the middle: these are the lower wings.

  7. 7. Fold the top half behind

    Mountain-fold the top half behind along the horizontal middle line. The model becomes a wide upside-down triangle.

  8. 8. Narrow the lower wings

    Top layers only: fold the outer edge in along the line from the top corner of the middle square to the middle of the lower wing’s outer edge. Repeat on the other side.

  9. 9. Fold in half

    Fold the whole model in half along the vertical centre line, left side over to the right.

  10. 10. Fold the top wing back to the left

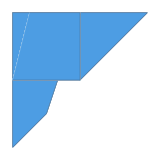
    Fold the top half back over to the left along a slanted line close to the folded edge: a little away from the fold at the top, meeting it at the bottom of the upper wing. A narrow body is left along the fold.

  11. 11. Turn over

    Turn the model over sideways. Both pairs of wings now show.

  12. 12. Fold this wing over too

    Now fold the top half over to the right along the slanted line that lies exactly on the one you folded on the other side. All the wings lie together, with the body between them.

  13. 13. Spread the wings

    Gently spread the wings apart. The body stands up in the middle and the wings make a shallow V: your butterfly is done!

Settings

Clear saved data