Skip to content
Paper Play

Geometry & modular

Business-card cube

Six business cards fold and lock into a sturdy cube with no glue. Each pair of cards is folded over one another as a guide.

  • DifficultyIntermediate
  • PaperBusiness cards, 9 × 5 cm × 6
  • Steps13
  • About15 min

Why this level: The units are easy, but the six must go together in order so every flap wraps a neighbour from outside, and the lid only goes in after lifting two flaps.

You need: 6 business cards or cards of one size (two each of three colours look best)

Preview Preview: checked on screen; real-paper verification is in progress.

Start folding

Story

Folding cards into little boxes is an old pastime. Prints from 1759 and 1772 show children building houses of cards that may have been stacks of such boxes. A teaching book from 1890 shows this cube made from six rectangles, and a French book of amusements from 1906 linked the cubes by their flaps into villages and trains. Nobody knows who folded the first one.

Did you know? In 2014 groups of folders joined thousands of these cubes each into twenty big “Menger sponges”, cubes riddled with holes. Together the twenty make up one even bigger sponge, built from 960,000 business cards!

Learn more (external sources)

Steps at a glance

  1. 1. Cross two cards

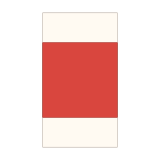
    Lay the red card sideways, white side up. Turn the blue card upright, coloured side up, and lay it across the middle of the red one. The white sides touch, and the overlap is a square.

  2. 2. Fold the bottom card’s ends

    Fold the right end of the red card up over the edge of the blue card and press it flat. Fold the left end the same way.

  3. 3. Turn over

    Turn the pair over as it is. Now the blue card is underneath.

  4. 4. Fold the other card’s ends

    Fold the top end of the blue card up over the edge of the red card and press it flat. Fold the bottom end the same way.

  5. 5. Open the flaps and pull apart

    Open every folded end back to a right angle. Lift the red card off and set it down the other way up. Each card is now a unit: a square with a flap standing up on two opposite sides.

  6. 6. Fold two more pairs

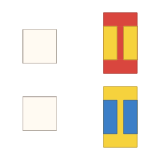
    Make two more pairs the same way from the last four cards. Lay the yellow and blue cards sideways, white side up, and lay the red and yellow cards upright across them, coloured side up. Fold the ends of each bottom card up over the edges of the top card.

  7. 7. Turn over and fold the other cards

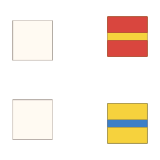
    Turn both pairs over as they are. The red and yellow cards are now underneath: fold their top and bottom ends up over the edges of the cards lying on them.

  8. 8. Open the flaps and pull apart

    As with the first pair, open every folded end to a right angle. Lift off the yellow and blue cards on top and set them down the other way up. All six units are ready.

  9. 9. Set down the floor

    Put one red unit in the middle with its flaps standing up. This is the floor of the cube.

  10. 10. Stand up the blue walls

    Stand the two blue units up with their flaps pointing inward and lower them inside the red flaps. The red flaps hug the blue walls from outside.

  11. 11. Slide in the yellow walls

    Pick up the two yellow units and open the flap that will go at the bottom out flat. Stand the units up, lower them inside the blue flaps, then fold the opened flaps in under the floor.

  12. 12. Close the lid

    Open the two top flaps of the yellow walls straight up. Turn the last red unit flaps down and lower it on top, its flaps going down outside the blue walls. Fold the yellow flaps back down over the lid. The cube is done!

  13. 13. Turn it and look

    Turn the cube around. Opposite faces have the same colour, and on every face two flaps of another colour wrap it from outside. It holds together without glue.

Settings

Clear saved data