Skip to content
Paper Play

Plants & flowers

Chinese bellflower

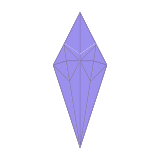
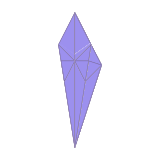
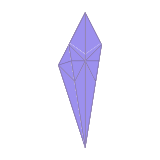
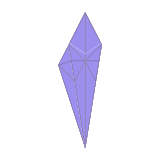
The traditional bellflower (kikyō) from a regular pentagon: the lily method, but with five petals instead of four.

  • DifficultyChallenging
  • PaperRegular pentagon (from a 15–24 cm square)
  • Steps18
  • About30 min

Why this level: Five squash folds, five petal folds and five narrowed faces, with many page-like layer turns in between.

You need: 1 regular pentagon of paper, Scissors (to cut out the pentagon)

Preview Preview: checked on screen; real-paper verification is in progress.

Start folding

Story

The bellflower (kikyō) is folded with the same moves as the lily, but from a regular pentagon instead of a square, so it has five petals instead of four. A Chinese origami book printed in Shanghai in 1914 already shows it under the name “bellflower”, and a Japanese origami picture book from 1935 also shows a paper flower called kikyō. The 1914 book does not say who first folded it.

Did you know? Real bellflower buds puff up like little balloons before they open — that is why the flower is also called the balloon flower.

Learn more (external sources)

Steps at a glance

  1. 1. Fold in half through every corner

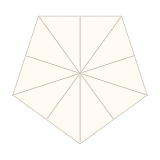
    Start with a regular pentagon: fold a square into one with our “Regular pentagon” model, then unfold the parts folded behind and cut them off along the creases. White side up, fold in half on the line from a corner to the middle of the opposite side, and unfold. Do the same through all five corners.

  2. 2. Collapse into the five-flap base

    White side up and a corner pointing down, use the creases to bring all five corners together at the bottom and press flat. The middles of the sides fold up as valleys and become the outer edges; the coloured side ends up outside.

  3. 3. Squash the right flap

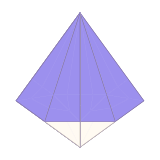
    Lift the top right flap upright, open its two layers and press it flat so its folded edge lies on the centre line. A coloured triangle shows above a white one.

  4. 4. Petal fold

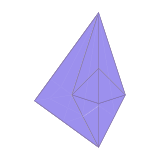
    Crease the two lower edges of the white triangle to the centre line, and the horizontal line joining the ends of those creases. Lift the coloured layer below the horizontal line upwards: its sides swing in to the centre line while the lower edges of the white layer underneath fold in along the creases. Flatten: a small diamond flap points up in the middle.

  5. 5. Turn a layer; repeat

    Turn the top right layer over to the left like a page. Squash the flap now on the right and petal fold it the same way.

  6. 6. Turn over; repeat

    Turn the model over. Squash the top right flap the same way and petal fold it.

  7. 7. Turn a layer; repeat

    Turn the top right layer to the left, then squash and petal fold the flap that appears.

  8. 8. Repeat on the last flap

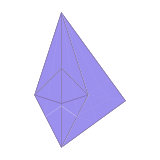
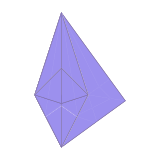
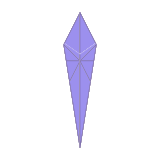
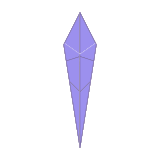
    Turn one more layer to the left and do the same on the last flap. With all five flaps done, the model is a long diamond.

  9. 9. Turn it upside down

    Turn the model so the wide part is at the top. The five points at the top will be the petals.

  10. 10. Turn a layer; narrow

    Turn the top left layer over to the right to show a smooth face. Fold the two lower edges of that face to the centre line; the creases start at the bottom point.

  11. 11. Turn two layers; narrow

    Turn two layers from left to right to show the next smooth face. Fold its two lower edges to the centre line.

  12. 12. Turn over; narrow

    Turn over and turn one layer from left to right. Fold the lower edges of the face that appears to the centre line.

  13. 13. Turn two layers; narrow

    Turn two layers from left to right and fold the lower edges of the new face to the centre line.

  14. 14. Narrow the last face

    Turn two layers from left to right and fold the lower edges of the last face to the centre line. All five faces are now narrow.

  15. 15. Gather the petals

    Turn the top layer on the right over to the left. Turn over, then turn the top layer on the left over to the right. Now the petals lie in two stacks: three on one side, two on the other.

  16. 16. Fold the petal tips out

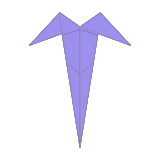
    Fold the tip of the top petal on each side outwards and down along a slanted line. Fold the bottom petal on each side out the same way behind.

  17. 17. Fold the middle petal’s tip

    Turn the top petal on the right (two layers) over to the left. Fold the tip of the middle petal, now on top on the right, outwards and down too.

  18. 18. Open the flower and stand it up

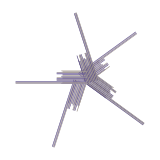
    Gently pull the five petals apart so they spread evenly around the middle, and stand the flower up. Your star-shaped bellflower is done!

Settings

Clear saved data